Quantcast
Channel: QVC : Community : Blogs
Viewing all 3342 articles
Browse latest View live

Cheater Pressure Cooker Pulled Pork

0
0

This is a cheater recipe because I use jarred BBQ sauce instead of making it from scratch. {#emotions_dlg.biggrin} The brown sugar & mustard add a little kick to the sauce.  The recipe is based on the one from the Cooks Essentials Pressure Cooker book. 

Cheater Pressure Cooker Pulled Pork 

Ingredients:

4 – 5 lb. Pork Tenderloin

4 strips bacon

1 onion – chopped fine

3 cloves garlic –minced

2 Tb. Spicy brown mustard

2 tsp. brown sugar

1 tsp. Paprika

18 oz. BBQ sauce

½ cup chicken stock

Directions:

I cooked the bacon in the pressure cooker so that I could use the bacon drippings to brown the pork.  You can use another oil.  Brown the pork on all sides.   Remove and set aside.  Add onions & garlic.  Cook for a few minutes until the onions soften.  Add all other ingredients and cook for a few minutes until hot & bubbly.  Return pork to the pressure cooker.  Lock the lid in place and cook for 50 minutes.

This is a sweet & tangy recipe.  The pork is moist & tender.  Enjoy!

You can find me on Facebook at: www.facebook.com/JayneBrownQVC

Twitter: www.twitter.com/jaynebrown1

Instagram: www.instagram.com/jaynebrownqvc

toGather: www.gather.qvc.com/member/JayneBrown


Decorating with Wreaths

0
0

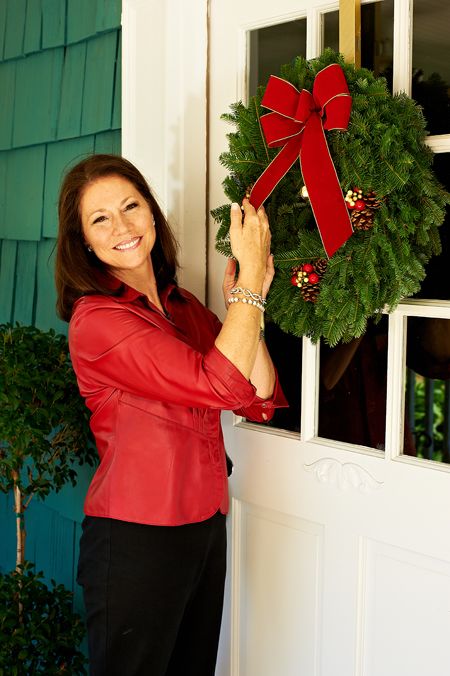
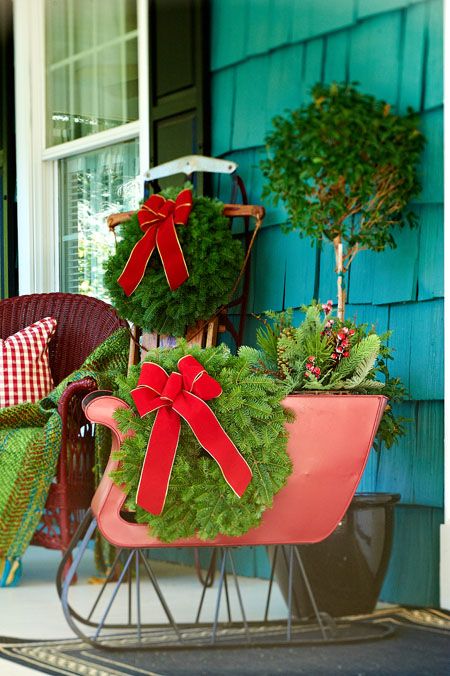
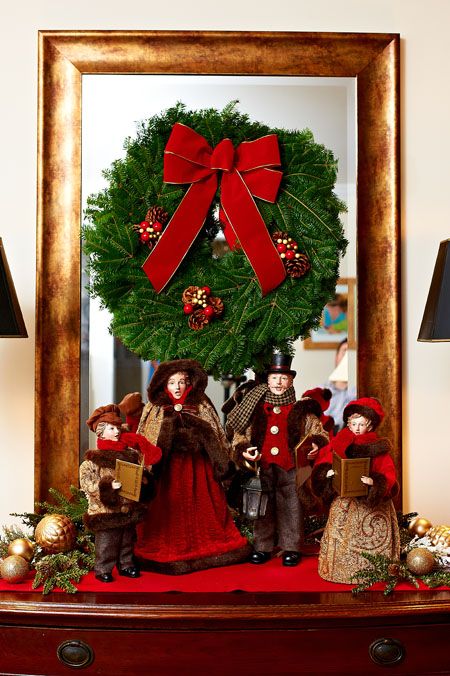
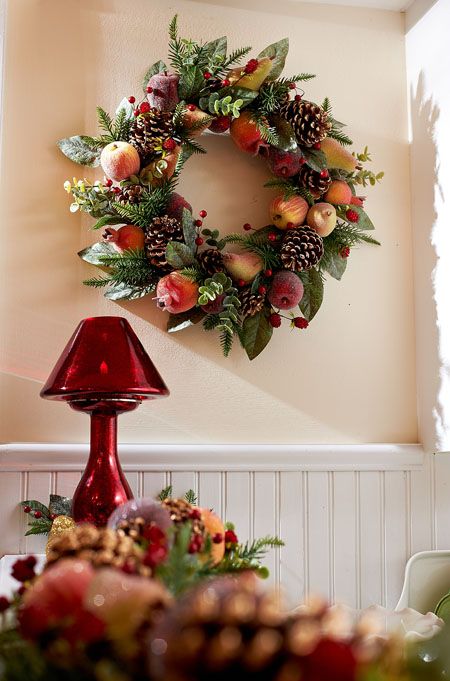
When it comes to holiday decorating, a wreath on your front door is a great place to start. But don't stop there. Also consider your entry way, over the mantel, on your table as a centerpiece

The front door is a great place to start.

Consider the Entryway

Over the mantel

on a sleigh outside

Over a mirror

Decorate an empty wall indoors

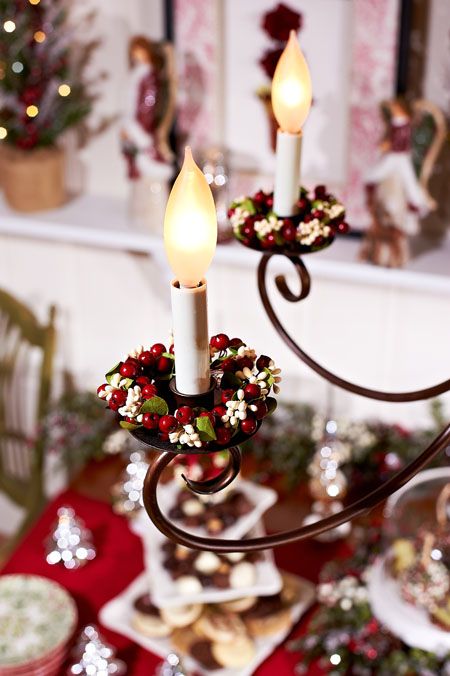
Even on your chandelier


To shop the items featured, explore my Heartfelt Holidays collection.


Drinks and Dessert Station - with my new Keurig 2.0 as the Star!

0
0

Last week, I held a little Birthday gathering for Lisa Robertson.  Most of these folks had never been to my house; so of course I cleaned as if Scarlett was coming for inspection.  {#emotions_dlg.scared}  Next up was transforming my circus of a home into a place for an adult birthday party.  My hope was that I would be able to create a place that everyone would mingle and visit.  I was shooting for a “cozy” ambiance; not formal--- I’m definitely allergic to formal!  

Since it was more of a drop in event that was heavy on the hor'deurves instead of a sit down dinner, I moved my dining room table up against my sliding glass door and turned it into a buffet table of sorts.  I set up all the food there. 


Then, I wanted to create a special place for the Cupcakes.  Eva, Lisa’s go-to stylist, had ordered Lisa’s all-time favorite cupcakes from her favorite bakery; so I knew they needed a place of honor.  Ultimately, I opted for a “Drinks and Dessert” station.  (I thought that sounded way more festive than “It’s on the end of the counter.”)


Fortunately, I also had my new Keurig 2.0.  I was able to make a carafe ahead of time for regular coffee and have K-cups on hand for specialty beverages as well as hot and cold tea.  Boy did this free me up to do other things.  Plus I think everyone enjoyed selecting and making their favorite drinks!

By the way, when our house is on “high-alert” in the mornings, I am loving the ability to brew a carafe.  That way, me, Nana, and Hubby can enjoy a cup together before we start our day.


Drinks and Dessert Station - starring my nw Keurig 2.0!

0
0

Last week, I held a little Birthday gathering for Lisa Robertson.  Most of these folks had never been to my house; so of course I cleaned as if Scarlett was coming for inspection.  {#emotions_dlg.scared}  Next up was transforming my circus of a home into a place for an adult birthday party.  My hope was that I would be able to create a place that everyone would mingle and visit.  I was shooting for a “cozy” ambiance; not formal--- I’m definitely allergic to formal!  

Since it was more of a drop in event that was heavy on the hor'deurves instead of a sit down dinner, I moved my dining room table up against my sliding glass door and turned it into a buffet table of sorts.  I set up all the food there. 


Then, I wanted to create a special place for the Cupcakes.  Eva, Lisa’s go-to stylist, had ordered Lisa’s all-time favorite cupcakes from her favorite bakery; so I knew they needed a place of honor.  Ultimately, I opted for a “Drinks and Dessert” station.  (I thought that sounded way more festive than “It’s on the end of the counter.”)


Fortunately, I also had my new Keurig 2.0.  I was able to make a carafe ahead of time for regular coffee and have K-cups on hand for specialty beverages as well as hot and cold tea.  Boy did this free me up to do other things.  Plus I think everyone enjoyed selecting and making their favorite drinks!

By the way, when our house is on “high-alert” in the mornings, I am loving the ability to brew a carafe.  That way, me, Nana, and Hubby can enjoy a cup together before we start our day.

I think that I will be keeping this new little entertaining edition of the "Drinks and Dessert" station for the rest of the holidays too.  You might even try one yourself!

Best,

Albany


Easy Brussel Sprouts

0
0

I’ve been testing side recipes for Thanksgiving lately, and this one for roasted brussel sprouts was easy and delicious! I’m thinking it’s a definite for my Thanksgiving menu because it’s healthy, delicious, and adds some color to the table (gotta make it look good!).  I hope you enjoy trying this one!

Here’s what you’ll need to make this recipe:

1 lb Bag of Brussel Sprouts

1 Red Onion

8 Cloves of Garlic

Olive Oil

Salt and Pepper

A Pinch of Dried Rosemary


Directions:

Preheat the oven to 400 degrees.  Halve the brussel sprouts and garlic cloves; and chop the onion. Then toss together with olive oil, salt, pepper and rosemary. 

Lay the mixture on a sheet pan and place in the oven for 35-40 minutes.  Be sure to keep an eye on them in the last five minutes so they don’t burn. 

Voila!! Easy, healthy, and delicious!!

Enjoy!!

-Alberti

Be sure to stop by my Facebook page and let me know if you tried them! Or if you just want to say hello!

I also have more recipes on toGather!


Risotto Under Pressure

0
0

A few nights ago, I had to get ready for work and so my husband offered to cook dinner. I cook about 90% of the meals in our house, but when my husband cooks, it's always really good. However, I wasn't prepared for his meal to come together so quickly and for the kitchen to still look spotless. Fast and only one pot to clean.. two reasons I love the pressure cooker!  The pressure cooker also makes this so much easier than a traditional risotto, which usually involves a lot of time and A LOT of stirring. This recipe took 10 mins and no stirring and it was just as good as risottos that take way more effort.  I went to get in the shower and by the time I came downstairs, dinner was on the table. He found the recipe online and tweaked it a bit.

Here's what you'll need:

1 tbs  butter

1  tbs olive oil

1  onion, diced

1 celery stalk, diced

1 clove garlic, minced

1 c. Arborio rice (it has to be this type of rice for it to be risotto)

2 tsp dried oregano
2-1/4 c.  broth, chicken or veggie

1/4 c. white wine 

2 bay leaves

14 - 16 frozen shrimp, thawed under cold water (or fresh shrimp)

2 c. fresh spinach, chopped

1/2 c. grated parmesan cheese

Add butter & oil to the pressure cooker. When the butter has melted, add the onions, celery and garlic and cook for a couple of minutes, until the onions are soft. Now, stir in rice and saute for 1-2 minutes. Add the broth, oregano and the wine. Put your lid on the pressure cooker and cook on high for seven minutes. 


When the timer is finished, release the pressure, remove the lid and add the shrimp. Saute for 1-2 mins.

Remove the bay leaves and add the spinach. Stir and cook until spinach is wilted and shrimp is cooked through. Turn off heat and stir in the Parmesan cheese. This came out perfect for us, but if it seems a little dry, add a bit more broth. 


 And enjoy :) 

If you give my husband's recipe a try, I would love to hear how it goes! Share your feedback, tips, and other recipes on my Facebook page, {Sandra Bennett QVC}. Be sure to follow me on twitter {@SandraQVC} and on toGather {Sandra Bennett} for updates & other news! 

Jewelry Tip - Stay Organized

0
0

We all have a ton of jewelry. With all the new trends, outfits to coordinate pieces with, and the recent X ring obsession, it can get to be a bit much. Can you guess who’s jewelry collections these are?

You've guessed it! Mary Beth Roe (the first photo) clearly as an affinity for Honora Pearls and Shawn Killinger (second photo) obviously loves to accessories with fashion jewelry.

Kerstin Lindquist is so creative! She uses this decorative beach chair to beautifully display her jewelry. 

With all of the different jewelry pieces we’ve acquired over the years, storing jewelry can be a challenge. Here is a little jewelry storage tip – be organized and not just for the sake of being organized. If you have a collection of nice things but it's all jumbled up and unorganized, it’s no longer a collection of nice things. So keep your jewelry arranged in a way that works best for you. It makes life easier and you’ll get more use out of your pretty things if you can actually see your jewelry and know exactly where to look for them.

Here is how Amy Stran stays organized:

And Jennifer Coffey has one too!

Courtney Cason's is so full she can't even close the door!

If you like how Amy, Jennifer & Courtney store their jewelry, you'll want to check out the 11/14 Today's Special Value. It's Lori Greiner's largest capacity jewelry storage cabinet ever and it stores over 800 pieces of jewelry. It has a place for everything and your jewelery is hanging in clear view like a beautiful store display.

Have fun organizing your jewelry!


Turkey Talk - Frying Your Thanksgiving Bird

0
0

Hello, foodies…

We’ve got just 14 days until Thanksgiving…two short weeks! Have you given your menu some thought? Do you know how you’re preparing the Thanksgiving bird?

It doesn’t matter how many times I make a turkey…I still need to stop and think about what I’m doing, so I can guarantee the turkey not only looks great, but tastes terrific. So…from now until Thanksgiving, I’m going to plan right with you and make time for some Turkey Talk in every blog. And we start…today!

The oven isn’t the only way to cook a turkey, foodies. Here are tips on frying the bird with a Butterball Turkey Fryer, which we’ve still got in stock here at QVC. And, it will ship to you in time for the holiday.


The speed at which you can cook a turkey start to finish in a fryer is pretty incredible. In fact, you’ll have time to make a whole separate recipe to snack on while you let the turkey rest. Might I suggest my Chicken Cordon Bleu Bites?

Cordon Bleu Bites
Serves 6–8

Chicken Cordon Bleu Bites

Ingredients:

Bites:

  • 1 lb ground chicken, cooked and finely crumbled
  • 1/4 lb thinly sliced smoked deli ham, finely chopped
  • 3 Tbsp butter
  • 1/3 cup minced onions
  • 1 cup + 4 Tbsp flour, divided
  • 1-1/4 cup milk
  • 2 tsp Dijon mustard
  • 2 tsp salt
  • 1/2 tsp black pepper
  • Pinch of smoked paprika
  • 3 eggs, beaten
  • 1-1/2 cups cornflake crumbs
  • Oil, for frying

Sauce:

  • 2 Tbsp butter
  • 2-1/2 Tbsp flour
  • 1 cup milk
  • 1/2 cup chicken stock
  • 2 cups grated Gruyère or Swiss cheese
  • 1/2 tsp salt
  • Pinch of nutmeg

Preparation:

To prepare the bites, place the chicken and ham into a medium-size bowl. Melt the butter in a medium saucepan over medium-high heat. Add the onions and sauté until translucent. Stir in 4 Tbsp flour and cook for a minute. Add the milk, mustard, salt, pepper, and paprika. Stir and heat until the sauce begins to simmer and has thickened. Fold the sauce into the bowl with the chicken and ham. Spread the mixture out onto a baking sheet and refrigerate until cool and firm, about 30 minutes.

While mixture is cooling, make the dipping sauce. Melt the butter on medium-high heat in a medium saucepan. Add the flour and stir for about a minute. Add the milk and chicken stock and continue to stir while heating. When the sauce has almost begun to simmer and has thickened, add the cheese, salt and nutmeg. Stir until the cheese has melted and sauce is smooth. Hold on very low heat until ready to serve, stirring occasionally.

To bread and cook the bites, set your turkey fryer temperature to 375°F. Take the cooled mixture by rounded tablespoonfuls and roll into balls. Place them on a clean baking sheet. In separate shallow bowls, place 1 cup flour, eggs, and crumbs. Coat the bites 4–6 at a time with flour and then dip and coat completely with egg. Finally, roll the bites in the bread crumbs, coating completely. Place the bites back onto the baking sheet. Deep-fry for 3–4 minutes, or until deep-golden brown. Serve with the dipping sauce.

This recipe is prepared with the Butterball Digital XXL 22-lb Indoor Electric Turkey Fryer (K41297).

Go to David's Recipe Item Page for the full list of items that David has used in his recipes.

I’ll blog with you again tomorrow. Thank you all for my birthday wishes—it was a wonderful, wonderful day and I still feel special!

Keep it flavorful!
—David


To my dear friend, Lisa Robertson

0
0

I'll start this blog with a few stories of our dear LR:


The first time I remember seeing LR I felt really intimidated. She's extremely pretty in person and probably one of the smartest women I've ever met.  So with that in mind... I thought best not to speak. You might have heard me talk about the first the time I chatted with Lisa. It wasn't my best moment... But she took my comments and laughed them off lightheartedly. Ah ha! We were off to a good start and somehow she didn't dislike me.


My first time in NYC was for fashion week and it was a dream come true. I was scheduled to work fashion week for nine days and was completely overwhelmed by it all. A new city, a new job, I was really missing my family, and I was praying I would be able to do QVC justice with the job I was assigned.  On the last particular night of Fashion Week, QVC hosted a huge party for guests and I was tasked with getting an interview with Rachel Zoe after our broadcast.  The broadcast ended early because of the popularity of our show and because of that I couldn't get to Rachel in time to grab the live interview because of the crowds. I thought I had blown it :(


I tried my best to keep it together. I was so nervous I had messed something up and since I had never worked in network TV before I didn't realize it wasn't a big deal. I got into a cab with Lisa and her makeup artist Eva when Lisa asked how my night went. I opened my mouth to speak but instead I just burst out crying. This was the last thing I wanted to do in front of anyone; especially her.


I think I sobbed about how I blew my interview, felt overwhelmed, missed my family, and had no clean laundry(ha!). Instead of thinking I was the most ridiculous person on the planet her and Eva just hugged me. I don't even remember what they said but I do remember really appreciating almost strangers trying to calm me down and make me feel better. 


As I got out of the cab, Lisa invited to me to something the next day and told me it was jeans and t-shirt attire.  "Just wear some really fun jewelry" she said. At that point I only had a few pieces my parents had given me over the years so that wasn't going to be an option. I can't even make this up... A few days later LR gave me two gallon sized bags of costume jewelry. She told it would be a good way to start my new collection. Seriously?!  Could she have been any nicer?!


I can tell you the last four and a half years with LR have been extremely fun.  She has taken me under her wing and I am forever grateful. To say I will miss her would be an understatement but I just know she has such amazing things in store for her.  She's the big sister I never had and the fashion interventionist I have sometimes needed. She's always got a funny story to tell, and always up for listening. At the end of the day she's a really good friend that through Thanksgivings and weddings has become a member of our family. 


Cheers to our friend, Lisa Robertson. I will miss you at the Q but know you will be such a great part of our lives in the future. You are a rock star (and a pretty one at that!) that lights up the room wherever you are.  Shine on girly... I love you!!


XO, CC

http://www.facebook.com/CourtneyCasonQVC

http://twitter.com/CourtneyQVC

http://instagram.com/courtneycasonqvc

http://gather.qvc.com/member/CourtneyCason/

QVC's Annual Gingerbread House Competition

0
0

It's that time of year! QVC hosts an annual gingerbread house competition among all of its employees to see who can come up with some of the best gingerbread creations. The top three win a donation to a charity of their choice! Here's a look at some of the winners and our favorites!

The North Pole

Classic

Vintage Themed

This Halloween inspired house was made by Pat James Dementri, Jayne Brown, and their friend Wendy!

Halloween Inspired House

Her House

Tribute to Joan Rivers

Eiffel Tower

Dragon's Lair

Kitchen Aid Mixer

NASDAQ

Around the World

QVC Cinema

And the winners are...

Third Place

Second Place

First Place

So, which was your favorite?! Tell us in the comments below.

Flashback Friday! My Mom & I Make Sock It To Me Cake

0
0

Hi, everyone!

It SNOWED here yesterday in the Philadelphia area! We had a fire going in our living room last night and it felt like the holiday season was really here. Truth be told, it practically is here. Thanksgiving is two weeks away, Christmas is just over a month away, and it’s time to make all those recipes we wait for and covet after the holidays are long gone. As the snow was falling, I found myself in the kitchen gathering ingredients to make my mom’s Sock It To Me Cake. And before I knew it, I had a cake in the oven. Do you remember when my mom came to make that with me on You’re Home with Jill?


I was going to call that a Throwback Thursday video but it’s Friday…so how about Flashback Friday?! :) Watching that again made me think about just how many family recipes I’ve shared and how many holiday videos we’ve created on YHJ. I’m so proud of what we’ve done and I know you’ll find my videos helpful. So get ready—this blog is my first official Flashback Friday post. I’ll share another favorite recipe, DIY project, or holiday tip every week…from now until Christmas. HAPPY HOLIDAYS!

From my home to yours,
—Jill

5 Ways to Teach Your Children Thankfulness

0
0

The amount of gifts my kids get this time of year borders on gluttony. Even at five they seem to expect that if they want it, they will get it...and then some... from Santa and the dozens of generous family members who adore them. I feel like it’s a consolation that at least my girls say thank you, most of the time, before ripping open the next shiny box. 

As a woman who values gratitude to our Lord up there with kindness and honesty, I really try to teach my girls to be thankful and show gratitude to those around us and generosity to everyone. I’ve put together 5 tips for helping kids, even the young ones, learn gratitude any time of the year.

1. Write Thank You Cards

At four and five my girls can barely write their names but they can color something fierce! I make sure they color a thank you card for every gift they get year round. I tell them who it is for and why, and make sure they get them done within a week. I also like to take recent photos of them and make them into thank you cards.

There's always a deal on one of those picture sites that makes the cards less expensive than the kinds you find at the store. It's also a great project for rainy, snowy days.

2. Make a Video

Snail mail too 2009 for you? Do what the kids are doing theses days and make a video. We've started a tradition of making short 10 second videos every Friday morning at breakfast that we send to individual grandparents or aunts or friends. Just to say hi and we love you. Everyone has a phone that takes video these days, so it’s as easy as texting or making a call. Now, when the girls get gifts from anyone I try and videotape them opening them. I have trained them to say thank you to the camera right after they open it. They are a hit and it’s a bonus that you have videos of your kids over the years.

3. End With Gratitude

Each night we finish our prayers with what we want to thank God for that day. I encourage the girls to say something that happened that day that made them happy. If they are having a rough night (which is not uncommon at their age, where bedtime is the enemy) I can at least get out of them "I want to thank Jesus for my mommy " or "my daddy " or "sissy. " We pray for everyone else too, and they often ask why we are praying for Bess or Beth and when I explain a little about someone having Cancer or going through a rough time, it teaches them to be thankful that they are healthy and happy. We always give God the glory in the end and don’t take for granted a good day. I do a gratitude journal every night and I thank the Lord for at least four things each day. I even take it a step further and write down what I am thankful for that will happen tomorrow. Advanced gratitude. That’s a high level move, so stick with me, ha! The point is, get those kids to realize something good happens every day.

4. Give

My kids have a piggy bank. They love to empty our pockets of change and feel the little pink porcelain pigs get heavier. When the pigs are full we take them to the bank and fill up their bank accounts.

We are teaching them saving early on. We’re also teaching them about giving. In my family we tithe. It’s not even a consideration that we wouldn't. No matter how bad times are, we always give at least 10% of what the Lord blesses us with. My kids see this in church or when we go to the local shelter and give money or goods. I talk about people who are less fortunate and kids who may not have a mom or dad to take care of them. I make it age appropriate and not scary, but try and help them understand that they have been blessed with an abundant life and not everyone is as lucky. I’ve tried to gently suggest they do what mom and dad do and give to the needy, but I never force the issue. 

But last month they did it on their own. The preschool sent home little boxes to put loose change into and then return for Unicef. I explained what they were and without even asking the girls went upstairs and started taking coins out of their piggies and filling the little orange cardboard box. I praised them for their generosity. Each day they would find coins around the house and put them straight in the Unicef box, until one day when they came to me and said they wanted to give the "Shelter" all their coins from piggy. Talk about mom pride! Which leads me to the most important way to raise grateful kids…

5. Lead By Example

Are you saying thank you to the waitress who brings you your drink, or putting money in the offering plate at church? Are you talking about how blessed you are to have the small house you have or are you constantly complaining that it isn’t as big as the Jones’s? Everything I learned about gratitude, I learned from my mom. She wouldn't let me out of the house until my thank you cards were done. She made sure we spent thanksgiving at a church serving the needy, and the number one gift she gave me is she taught me the immeasurable benefit that comes from giving 10% ("of gross Kerstin not of net, do you want God to bless all of it or just what comes after taxes?") My mom was a single mom with a job as a teacher. She had every right to complain and I’m sure she did, but what I remember most is her generosity and gratefulness. What do you want your little ones to remember about you?

Have a blessed Thanksgiving, and In case no one else says it, please know I’m thankful for you!!! 


Follow me and my crazy crew on Facebook and Twitter!

XO,

Kerstin


Stephen Takes a Trip Along the Wild Atlantic Way!

0
0

November in Ireland brings strong winds and plenty of rain, so why not enjoy this fierce weather with a trip along Ireland's Wild Atlantic Way?

The world famous costal route is 2,500 kilometers (1,553 miles) long and stretches from Kinsale, in the South of Ireland, all along the west coast ending at the tip of County Donegal.

It takes in the wildest and most breathtaking scenery, and you can really feel the land and wild sea collide as you journey along the route.

If you are planning to take this trip, it’s well signposted with the distinctive 'WWW' logo and, in many cases, brings you off the beaten track to visit tiny villages and hidden coves – quite a treat!

I did not get to travel the whole route, but the photos I am sharing are from the Red Strand in County Cork, the North Mayo coastline, to Ballycastle Head, and its famous sea stack.

The wind was fierce, the sea was wild, and the rain was bucketing down, but the stunning beauty of the land and the awesome sight of the Atlantic ocean made this a memorable trip, and I am happy to share this with you.


Stephen Walsh, Connemara Marble


Shop Connemara Marble jewelry and Stephen’s book The History of Connemara Marble on QVC.com.

Mugs with Meaning

0
0

We've got a great Keurig deal as our TSV today, and it got me thinking about how I've unintentionally become a coffee mug collector over the years. I'm a big coffee drinker (thank goodness or my name would be ironic and silly!), and over time I've accumulated quite a few "mugs with meaning." Do you do the same? Below are a few with the stories behind them. It makes the few calm minutes in the morning even more special when the mug carrying my Keurig brew holds memories too!

I speak often on air of my "Happy Place" in Colorado, a small town called Ouray. I go there about once every year. These two mugs remind me of Ouray and the wildlife that roam main street like they own the place!


Mint is hands down my favorite color! Gabby picked this up for me knowing I'd love it for the color alone. She was right!

My boss gifted me this last year at Christmas. She noticed quickly after meeting me that I'm quite the dreamer. I thought it was so sweet that she included a note encouraging me to continue chasing my aspirations.


Gabby painted and fired this one in a class she took five years ago. *sniff*


I bought this mug for Gabby last year and she decorated it herself. She has a "bedtime tea" ritual and adorned this one with instructions (note the Keurig in step one!) and favorite things (QVC is there too!).


Do you have a favorite mug? A favorite brew? Tell me below!

Do It Yourself Coffee Bar - Just in Time for Thanksgiving!

0
0

Are you hosting Thanksgiving brunch or dinner at your home this year?  In addition to the usual concerns (Is the house clean?  Where will everyone sit? What time is best for everyone?)...how about the rest of the details?  

Hopefully you have been shopping along with us here at QVC and are all prepared with your Masterbuilt Turkey Fryer for the perfect turkey, all of your Temp-tations Dinnerware to ensure a gorgeous table setting, and of course, David Venable's latest cookbook "Back Around the Table" to help guide you with some fantastic ideas for your feast. 

After you have your meal all planned out, what comes next?  Instead of serving coffee, tea and hot cocoa the traditional way, how about setting up a coffee and beverage bar to be more entertaining for your guests? 

Our Today's Special Value, Keurig® 2.0 K550 Brewing System with 42 K-Cup® packs and 8 K-Carafe packs will make your entertaining this holiday season effortless.  Not only does it brew individual K-Cup® Packs with over 275 varieties to choose from, this brewer also brews a carafe up to 30 ounces for your guests as well!  It comes with a 12-count box of Snapple® Lemon Iced Tea K-Cup® packs, a 12-count box of Starbucks® Pike Place® Roast K-Cup® packs (yes - that’s right Starbucks!), a 12-count box of Swiss Miss® K-Cup® packs, a 6-count variety box of K-Cup® packs , a 4-count variety box of K-Carafe packs, and a 4-count box of The Original Donut Shop® K-Carafepacks. Also comes with a water filter starter kit with four additional filters!  Large 80 ounce water reservoir, hot water on demand and strength control are also amazing features on this Keurig® 2.0 brewing system.  You have all you need.

This brewer is perfect for this holiday season.  It helps keep your guests cups full without constant running back and forth to the kitchen for refills.  It also gives your guests many more options for a more personalized experience.  Offering your guests a fabulous coffee bar to go with the delicious desserts you have planned would be a wonderful way to end your holiday meal.  Something that your guests will love and something that will free up some of your time to spend with those in your home for this special holiday.  Sounds good? We think so. Want to do a coffee bar of your own? How about offering your guests a signature drink to make if they like? Here's what you will need:

*Keurig® 2.0 K550 Brewing System

tsv

*A buffet area close to your dessert station or a cart that can be moved into place easily [We love the Temp-tations Old World Bamboo Top Folding Kitchen Cart (K40326) and the Folding Island Kitchen Cart with Hand brushed Textured Top (K39725)]. 

cart

*Coffee cups and iced beverage tumblers [We love Temp-tations floral lace set 4 mugs with metal rack (H201207)]

mug holder

*Napkins

*Stirrers

*Spoons

*Sugar and Sweeteners

*Milk, cream half and half

*Other fun toppings (whipped cream, chocolate syrup, caramel syrup, pumpkin spice, cinnamon sticks, and flavored coffee syrups)

*Assortment of K-Cup® packs and K-CarafeTM packs (all included in the Todays Special Value)

*Keurig® 2.0 Carousel (K41517) to hold all those beverage options

 k-cup carousel

*Drink of choice recipe (we have included 2 of our favorites for you to choose from.  Print them out and frame them on your cart or buffet.  Don't forget to get the ingredients!)

recipe #1

recipe #2

Set up your brewer on the cart along with all of your fun "fixings."  Fill your carousel with all of your varieties of beverages.  Place your recipe in a frame next to the brewer and mugs and you are ready to go!

Hope you and your guests enjoy your Thanksgiving and that our coffee bar makes entertaining a bit easier and more fun!

Don’t forget to check out my toGather page for fun and thoughtful holiday gift and entertaining ideas as well!  Perfect for the teacher gifts, hostess, or an extra gift to have on hand!

XOXO,

Melissa Fleming Epps


Be the Best Thanksgiving Guest Ever

0
0

I’ve spent the majority of my working life in the 24/7 live television business (first in news, and now on QVC), which means that I’m far away from family on major holidays. This has put me in the uniquely wonderful position of being a holiday guest (read "mainstay") for some very special friends. For the past couple of years, I’ve had the privilege of spending Thanksgiving with my friend and colleague Courtney Cason, her family, and Lisa Robertson

First of all, and you know this, she is a delight :) And she’s a terrific cook (she’s experimental, daring, and traditional all at once), and she has one heck of a fun, easy to laugh, family. She makes it oh-so-easy to be a guest ---I feel comfortable arriving in some casually festive duds with a bottle of wine in hand. I always feel that my job as a guest is to help whenever, and wherever possible, and get out of the way when necessary :) (like when the turkey is coming out of the oven!). But if you do want to bring something a little special here are a few ideas: 

1. Bring a beautifully scented candle to your hostess, just make sure it's a neutral smell. I think things like cinnamon, vanilla, spice, or other seasonal scents are good. 

2. Bring something that is useful for the occasion and will help her out. If you are bringing food, bring a platter or bowl to serve it in. With the low prices of brands like Temp-tations and Lock & Lock, you can leave the vessel with her as a gift! Same goes for the bags you carry stuff in: don't bring a bunch of plastic or paper bags, which just adds to the trash that she will already have to clean up. Bring a beautiful tote bag or insulated bag and let her keep it.


3. At holidays like Thanksgiving and Christmas, you can never have too much food. But, at the same time, your host may have worked very hard on a particular menu, so you don't want to mess that up. Bring something for dessert, or better yet, something for the next morning like a coffee cake or croissants. 

4. Flowers are great, but they don't last. Bring a (high quality!) plastic floral arrangement and she'll be able to enjoy it forever! Plus, it's good for the hostess with pets, and they won't get into the flowers! 

5. Ornaments are always a great gift, especially at Thanksgiving because the timing is perfect. She will have something new and beautiful to put on her tree right after the holiday is over. 

6. Wine, wine, wine. I repeat, wine is always good. 


Truly, the time around a holiday table with family and/or friends is really about fellowship, laughter, and gratitude--- for good health, nourishing food, and people who care. Cheers to you this holiday season, and whether you’re spending it with family or friends, count yourself lucky to be surrounded by love and affection.

-Rachel

Cashmere Infinity Scarf!

0
0

Hi everyone! How fabulous is this chilly weather?! I’ve been waiting for it to get cold so that we can bundle up and finally show off our cold-weather wardrobes. These cold days could not have arrived at a better time because my new TSV is the most gorgeous way to stay warm.

This Infinity Scarf is our FIRST cashmere TSV – how major! You will adore the details on this scarf. It has a beautiful basket stitch, delicious 2-ply cashmere and it’s the perfect width – not too wide or bulky. Plus, you MUST feel how luxurious and soft it is. It is heavenly! 

When I designed this, I was inspired by texture, dimension and the century-old technique of basket making. I love to knit and crochet and I created a piece that blends the craft of knitting with the luxury of cashmere.

Of course, you’ll want a few of these for yourself but they are also PERFECT for gifting. They were made for the holidays – cashmere is the ultimate gift! Pick out one for everyone on your list and you will literally be done with your holiday shopping.

A cozy, infinity scarf is the easiest way to elevate your look. You will literally wear this every single day so you’re going to want to invest in a few colors. I created some great neutrals that you can wear with anything – Cream, Heather Grey, and Black. I also picked out brights and elegant jewel tones, so you can add pops of color to your winter wardrobe. We have a fabulous Passion Pink, a deep Russet Red, Dijon – one of my personal favorites, Marine Green Heather, and a lovely Royal Blue.

Infinity scarves are amazing because you can style them in so many different ways.

The Classic Double Loop

Passion Pink – our signature color!


If you need a little extra warmth, double up the scarf for a cozy, chic look. This is the perfect way to wear your scarf with a coat or a light jacket. Place the scarf over your head, twist the scarf and loop it again.

The Keep It Simple

Black – classic!


For a more transitional look that works from outdoor to indoor, untwist the scarf and let it hang. Wear it with a blouse, a simple t-shirt or a cashmere sweater. The more cashmere, the merrier!

The Polished Pull-Through

Royal Blue – spectacular!


Last but not least is the pull-through loop. This shows off the versatility of the Infinity scarf. To achieve this look, simply fold the scarf in half, place the scarf around your neck – allowing equal length on each side and place one end through the opposite opening and pull it through.                                                      

You are going to fall in LOVE with this scarf; it is one of our BEST TSVs yet! See you Monday, November 17!

xIsaac

http://images.qvc.com/is/image/pic/co/4imlive1114.jpg

"Dressing" The Tree

0
0

Many of you have asked to see the way I decorate for the holidays so I decided to  give you a sneak peek at what's to come. 

Step 1 – Pick the perfect tree: 

I found the perfect tree to compliment my family room. Because of my tall ceilings, I didn’t want it to take up the entire room, so I went with a 9 ft. Bethlehem Lights slim tree. I wanted to do a traditional look this year so I went with the all white tree option. I fell in love with it during the Lisa Robertson show and had to have it! Once I got the tree, I was so excited I had to put it up immediately!

My first step to “dressing the tree” was tucking the garland in and wrapping it around. Then I added about 36 (gold & silver) picks and champagne beads for foundation. 

Helpful hint: always decorate your tree with the lights off so you can track your color patterns. 

I’m on my way but I have lots more to show you! Be sure to check back each week for the next step of my Christmas tree journey! 

-Alberti

Join me on my Facebook page; Alberti Popaj QVC

And on toGather!


Easy, Gluten-Free Tiramisu Pie & More Turkey Talk - How to Smoke the Bird

0
0

Hello, foodies…

I just walked in the door after a cookbook signing at QVC’s Studio Park. We had another nice turnout and I’m thrilled so many of you made it out our way for these opportunities. I’d like to give a great big shout out to Stephanie, a very lively 89-year old who does the happy dance right along with me when she’s doing her physical therapy. I signed books for Stephanie and her daughter today. If you haven’t yet gotten your book signed, there are a few more opportunities on the horizon. Check out the In the Kitchen with Davidpage on QVC.com for the latest schedule and check back often for updates.

Before I tell you about Sunday’s recipe, I just want to thank you all again for my birthday wishes. I was overwhelmed by your lovely messages. I’m wildly blessed to have such wonderful foodies in my life.

Now...who wants pie!? Our next featured this Sunday is an Easy, Gluten-Free Tiramisu Pie. The holidays can be particularly tough on those of you with any kind of dietary restriction. So, we worked to create a gluten-free pie that doesn’t taste gluten-free. That way, everyone can eat the same thing…and enjoy it! Our girl Mary gave this pie her golden seal of approval and I hope you’ll consider making it this year.

Easy Gluten-Free Tiramisu Pie

Easy Gluten-Free Tiramisu Pie
Serves 10-12

This recipe is prepared with the Keurig 2.0 K550 Coffee Maker with 42 K-Cup Packs, 8 K-Carafe Packs & Filter (K41380).

Go to David's Recipe Item Page for the full list of items that David has used in his recipes.

Ingredients:

Crust:

  • 1 9" frozen, ready-to-bake, gluten-free pie shell
  • 1/3 cup semisweet chocolate chips, melted
  • Coffee syrup:
  • 1/3 cup strong brewed coffee
  • 1/8 cup sugar

Filling:

  • 3 egg yolks
  • 1/4 cup sugar
  • 1/4 tsp vanilla extract
  • 8 oz Mascarpone cheese
  • 1 oz marsala or brandy
  • 1-1/2 cups heavy cream
  • 2 Tbsp +1 tsp unsweetened cocoa powder, divided
  • 12 gluten-free ladyfingers

Preparation:

  1. To prepare the crust, bake the pie shell according to the manufacturer's directions. Cool completely. Brush the melted chocolate over the cooled pie crust, making sure it coats the entire inside surface of the baked pie shell. Set aside.
  2. To prepare the coffee syrup, place the coffee and sugar into a small saucepan and bring to a boil. Place into a small, shallow dish and refrigerate until completely cool.
  3. Prepare the filling in the bowl of a stand mixer fitted with a whisk attachment. Beat the egg yolks and sugar until thick and pale, about 6 minutes. Add the vanilla extract, Mascarpone cheese, and marsala. Mix until smooth. In another mixing bowl, beat the heavy cream until medium peaks form. Gently fold the whipped cream into the Mascarpone-egg mixture until fully incorporated. Divide the mixture in 2 batches.
  4. Sift 2 Tbsp cocoa powder into 1 batch of the mascarpone mixture and gently fold until evenly incorporated. Spoon into the pie crust and even out the top with a spatula. Refrigerate for 15 minutes. In the meantime, place 5 ladyfingers into the bowl of a food processor and pulse until completely ground. Fold the crumbs into the other batch of mascarpone. Spoon the mixture on top of the chocolate mascarpone and spread it out evenly with a spatula.
  5. Cut the remaining ladyfingers into 1/2" pieces, toss them into the coffee syrup until fully coated, and place them on top of the pie, lightly pressing them into the filling. Sprinkle the remaining teaspoon of cocoa powder evenly on top. Lightly cover with plastic wrap and refrigerate for 4 hours, or overnight.

It’s time for some more Turkey Talk! If you missed yesterday’s special blog post, go check it out…I used the Butterball Turkey Fryer to fry a turkey and shared a bonus recipe you could make in the fryer. Today, let’s smoke a turkey with the help of the Masterbuilt Electric Smoker, which you can still get in time for Thanksgiving, if you don’t own one already.

So what else can you make in your smoker? How about my Baked Corn Casserole! When your turkey has an hour and a half left to cook, pop this in your smoker. For the last 10 minutes, remove the foil to add a hint of smoke flavor.

Tell me about the bird for today’s blog question. How will you make your turkey this year? In the oven? Fryer? Smoker? NuWave oven? I’ll see you Sunday for In the Kitchen with David at Noon ET.

Keep it flavorful!
—David

Mary Beth's Menu - Souper Burgers

0
0


Souper Burgers

  • 1 pound ground beef
  • 1 egg, beaten
  • 1/3 cup dry bread crumbs
  • 1 can cream of mushroom soup
  • French fried onions
Combine ground beef, egg and bread crumbs. Shape into 4 patties and cook thoroughly on medium heat in a skillet. Drain excess fat. Spoon soup over cooked burgers, cover and simmer on low to medium heat for 20 minutes. 
Top with french fried onions and serve on your favorite bun.
Experiment! This time I added swiss cheese and it was delicious. Add bacon, lettuce or tomatoes .... personalize them any way you like.
Counting our blessings,
Mary Beth Roe


Viewing all 3342 articles
Browse latest View live


Latest Images