Quantcast
Channel: QVC : Community : Blogs
Viewing all 3342 articles
Browse latest View live

DIY Wine Glass Charms – Put That Old Board Game to Good Use!

$
0
0

Hi, everyone!


Consider this Wednesday’s You’re Home with Jillyour holiday entertaining guide. It’ll be everything you might expect…I’ve got home essentials to help you be the perfect hostess, I’ve got a delicious recipe your guests will go crazy for, and I’ve got the greatest trick to keeping your guests wine glasses straight!

Homemade Wine Charms


I know you have a game with letters that you and your family just doesn’t play anymore. When you find that game, here’s what you need to do:


Gather:

  • Letters
  • Dremel tool or drill
  • Silver floral wire
  • Super glue
  • Ball chain


Then:


  1. Drill a very small hole in the top of your letter with a small drill bit or Dremel.
  2. Take the wire, form a tiny loop, twist, and cut the ends short.
  3. Carefully add a drop of glue and insert the ends of wire into the drilled hole.
  4. Thread the ball chain through the loop and cut it to fit loosely around the wine glass stem.


Now, obviously you’ll want to make a wine glass with your initial first. Then, you’ll need to test it out on your favorite glass. If that glass happens to become full of wine, sangria, or your favorite beverage, that’s all part of the testing process. You’re welcome!


XOXO,

--Jill


Skinny Green Bean Casserole – What’s Your Favorite “Skinny” Recipe?

$
0
0

Hello, foodies…


I wrote a surprise blog on Wednesday to share something really exciting…we just launched a Pinterest Sweepstakes! And you could win a copy of my new cookbook, Back Around the Table or Le Creuset cookware! All you have to do is click here: https://api.curalate.com/v2/contests/303252225. Follow the instructions…pin your favorite one-pot meal and use #GetCooking in the description. Submit your email address & you’re entered. Good luck!


And now back to your regularly scheduled programming. Ha. Remember that? Do you remember sayings like that? Times have changed so much…it’s fun to just remember the “old” days sometimes and feel nostalgic. It’s also comforting to make the recipes we grew up with…like green bean casserole. That’s a classic that graces virtually every holiday table at Christmas and/or Thanksgiving. And since we’re making Classics with a Twist all throughout October we wanted to make a version of this recipe that’s tasty, but just a little lighter.


Skinny Green Bean Casserole


Skinny Green Bean Casserole

Serves 10–12


Ingredients:

3 Tbsp olive oil

1 medium yellow onion, peeled and chopped

6 garlic cloves, peeled and minced

1 tsp ground black pepper

1-1/4 tsp salt

1/2 tsp dried thyme

2 lbs frozen cut green beans, thawed and drained

2 cans (10.5 oz) low-fat, low sodium, condensed cream of mushroom soup

1 cup low-fat milk (1%)

2 cups cooked wild rice

1/2 cup crushed fried onions


Preparation:


Place the oven rack in the middle level and preheat to 350°F. Lightly grease a 3-quart casserole. Set aside.


Heat the oil over medium heat in a 5-quart stockpot. Add the onions and garlic and cook for 3–4 minutes, or until the onions are translucent.


Add the black pepper, salt, thyme, and green beans. Stir and cook for 4 more minutes. Reduce the heat to medium low, pour in the condensed soup and milk, and stir until well combined. Add the cooked rice and stir until fully incorporated.


Pour the mixture into the prepared pan and bake for 20–25 minutes, or until the mixture is hot and bubbling. Sprinkle the fried onions on top and bake for another 10 minutes.


This recipe is prepared with the Temp-tations® Old World 24-Piece Complete Oven-to-Table Set (K38331).


Go to David's Recipe Item Page for the full list of items that David has used in his recipes.


What do you think, foodies? I couldn’t believe how flavorful this dish is even though it’s not loaded with cheese, butter, potato chips, or any heavy ingredient. If you’re watching your diet, this dish can help you stay on track this holiday season. Lucky for you, everyone else at your dinner table will love it just as much.


For your blog question today foodies, tell me about a favorite dish that you’ve lightened up. Do you make a lasagna with low-fat cheeses? Maybe chocolate chip cookies with applesauce? Mashed cauliflower instead of mashed potatoes?


I’ll see you for In the Kitchen with David on Sunday at Noon ET.


Keep it flavorful!

—David

Lips that Last

$
0
0

Lips That Last

I was talking to my friend, Kerry, this week about lipstick. She was telling me about looking for a lipstick that would last. I think most of us can relate -- there’s nothing worse than lip color that wears away. Well, starting with a good lipstick is important, but a few simple tricks can really help.

Here are the steps I find really work to help my lipstick stay put!


Start with clean bare lips


Line the outside of your lips first, following the shape of your lips

Fill in the entire lip with liner

Choose a lipstick color and apply it to your entire lips


Follow the lipstick with gloss for a pretty shine


That’s it...the best way I’ve found to make my lip color last! And if you like the lip products I used today, just click here to take a closer look.

Enjoy!

See you in the morning.

Leah :-)

Live Shoe Shopping Show - Halloween Fun - Who's Shoes? - Where's Kiki?

$
0
0

My human family is at it again. They love Halloween and these pictures were shown at the live show (that I was NOT invited to). Just sayin’.

So – here they are in their costumes and having fun at the show. It was the very first live audience for Shoe Shopping so there was a lot going on.

Where am I you ask? You’ll see.  

Cute Deirdre.

Sweet Cara.

The whole gang dressed as Hocus Pocus characters.

Say cheeeeeese Alberti.

Who wore the witch hat better?

Hmmm..what's on Amy's head??? 

Selfie time.

Angel brought gifts. So nice.

Angel doing a pretty scary witches scream.

Who is that masked man?

Thanks to Angel for the witches boot gift and for being the first "whose shoes" secret guest. If you're not sure what that is, you have to tune in next time to find out.

And my human mom wanted me to thank everyone for coming to the live show. She loved it and had a blast and hopes you did too!

As for me - here I am - in another hat.

I think I need an agent.

-Kiki


Have Questions for the L'Occitane Team? Post them now!

$
0
0

A258129Hi! My name is Ashley Nadon, and after over five years at L'Occitane, I’m a super-fan of this incredible brand. A little bit about me… I married my high-school sweetheart a couple years ago--we met when I was just 14, saw sparks fly years later at the very end of high-school, and finally tied the knot 10 years later while living in NYC. Now we have recently moved back to our hometown of Houston, Texas, and have our first baby on the way, a girl… December, get here already! Well actually, our second baby, since we have our precious little Cocker Spaniel, Tex.

And L'Occitane is baby #3! I have done everything from work with magazines and beauty editors to share the news of L'Occitane to developing products for QVC. I’m thrilled now to be able to present L'Occitane to you at QVC!

Now finally, let’s talk TSV®! We started brainstorming for the 2014 TSV with the L'Occitane and QVC teams a year ago, and we all agreed that (1) we wanted your favorite products included, like Shea Hand Cream infused with shea butter, Shea Body Lotion and Almond Shower Oil; (2) we wanted to bring you something BRAND NEW--the Ultra Soft Body Cream formula will leave you wondering how there could be a cream so moisturizing and soft yet light, and the delicious scents--don’t even get me started; and (3) bring in one of your favorite items from the past couple of seasons, the Bonne Mere Soaps. To wrap it all up (pun intended), we know you love flexibility, so we boxed the collection in four separate boxes so that you can gift all together, split into separate gifts, and even keep some goodies for yourself. Fair warning: you may get your goodies home with every intention of gifting and yet… there they are… staying home with you! It’s OK, enjoy!

What I love so much about L'Occitane at the end of the day is the dedication to sourcing the highest quality ingredients and creating luxurious products that are just a pleasure to use. I’m so proud of how closely we work with all of our suppliers to ensure this quality and complete traceability.

If you ever have the chance to visit Provence, in the south of France, you would see that there is a very special way of living “the good life”, sometimes called the art-de-vivre. It’s about taking the time to enjoy the little pleasures in life and creating daily happy moments. We can’t all unwind each evening on our villa terrace in Provence, but go ahead, wherever you are, have that glass of rosé and a slice of cake, breathe in the beauty of nature and let your skin indulge in some buttery shea-goodness!

The L’Occitane team and I are logged in all day, so please post questions below that we can answer for you about the TSV or L’Occitane in general!

Hero Of The House

$
0
0

I write a lot of blogs about beauty products, so you may be wondering why I'm now blogging about the Coleman lantern. Actually, I was asked to write this blog because recently during a host team meeting, I started telling everyone how much I love my lantern. I raved about it so much, someone suggested I share my positive review with you.

Two years ago, we got word that Hurricane Sandy was going to affect our area. I was at work the day before the storm hit and I was telling Sean Pickford, one of our on-air guests, that I was worried that my family would not have enough flashlights and batteries. He had an extra Coleman lantern with him, and he was kind enough to let me take it home. Thankfully, our town was spared the worst damage, but we did lose power for several days. That Coleman lantern became the hero in our house. It provided so much functional light and kept my kids from being scared when the entire neighborhood went dark.

I love the Coleman lantern because provides enough light to illuminate a room and it breaks apart into mini lanterns. When someone needs to leave the room, they can take one of removable side panels with them, giving them light but not leaving the rest of the family in the dark.

We relied heavily on our Coleman lantern for a couple of days. However, our friend's family didn't have power for a week. We let them borrow the Coleman and they raved about it too. Since then, we've unfortuantely had to rely on our lantern several more times, most notably during last winter's ice storm. We didn't have electricity for two days. Our house went down to 45 degrees inside, but at least we had light.  

This summer, my kids and I got to enjoy the Coleman during a summer camping trip. It lit up the entire tent like a lamp and the removable panels were perfect for late night trips to the bathroom. So, when I heard about the new Coleman lantern, I figured I already loved mine so much, that I didn't need another one. Wrong! This new version is even better. It feels less bulky when you carry it and the batteries go in much more easily. I really like the new sleek design and the bright, but more diffused, light it provides.

I would recommend this to every household, but it also makes a fantastic gift for those hard to buy for people on your holiday list.​


Be sure to find me on Facebook -- Sandra Bennett QVC

Twitter: SandraQVC

toGather: Sandra Bennett 

Skip the Coffee Shop—Make Your Own Pumpkin Spice Coffee!

$
0
0

Hello, foodies…


October 7, 2014 seemed so far away just a few short months ago. But this time tomorrow, my second cookbook, Back Around the Table will be available in book stores around the country and already on its way to you if you pre-ordered it from QVC. I am over the moon about this book and I’m so looking forward to hearing what you think of its 156 recipes. All of them are comfort foods but each one has a special twist to make it modern, fresh, and exciting.


As with the first, this cookbook was a true labor of love and I’d like to thank the entire In the Kitchen with David team at QVC for its hard work and support. Without you all, this book wouldn’t exist. For that, and all you do each and every day, I’m eternally grateful.


This Wednesday’s recipe is a true celebration of fall and that corner coffee shop’s worst nightmare.

Pumpkin Spice Coffee
Serves 4–12


Ingredients:

Pumpkin-Spice Mixture:

2 tsp ground cinnamon

1 tsp ground nutmeg

1 tsp ground ginger

1/4 tsp ground cloves


For 4 Servings:

1-1/2 tsp pumpkin-spice mixture

1/4 cup ground medium-roast coffee

4 cups cold water


For 8 Servings:

3 tsp pumpkin-spice mixture

1/2 cup ground medium-roast coffee

8 cups cold water


For 12 Servings:

4-1/2 tsp pumpkin-spice mixture

3/4 ground medium-roast coffee

12 cups cold water


Preparation:


Combine the spice mixture and coffee in a small bowl. Pour it into the filter of a drip coffee maker. Add water and brew according to the manufacturer's directions.

Pumpkin Spice Coffee

This recipe can be served with the In the Kitchen with David® Ceramic Mug (K38333).


Go to David's Recipe Item Page for the full list of items that David has used in his recipes.


Your blog question today, foodies, is what’s your go-to coffee? Do you like cappuccino? Caramel iced coffee? Are you an espresso person? I’ll see you Wednesday at 8pm ET.


Keep it flavorful!

—David

From Farm to Table

$
0
0

My friends, Joyce and Bryan, started a small vegetable garden in their back yard as a hobby. They wanted to grow some fresh food for their family, and then the hobby grew into a larger garden with tons of veggies, flowers, herbs, and everything you can imagine!! Look at some of this year’s crop!!

They even make their own pickles, and boy are they delicious!!!! 

During a conversation we had one night, I mentioned to them that I loved butternut squash soup and that they should grow some. Well Bryan took my advice and grew some just for me. 

So I decided that I would use their bounty to make some yummy soup, and now I am going to share it with you!


Savory Butternut Squash Soup (from Town and Country Living)

Ingredients

1 butternut squash; peeled, de-seeded, and cubed

2 carrots, cut in thick slices

1 medium-sized onion, cubed

2 gala apples, peeled, cored, and cubed

3 cloves of garlic

2 tbsp. extra virgin olive oil

2 bay leaves

1 tsp dried thyme

1 tsp of dried sage

1/2 tsp salt

1/4 tsp white pepper

1 cup light cream

32 oz. vegetable stock, pre-made or from scratch

Instructions

Preheat oven to 425° F.

To start, peel and cut a butternut squash into large chunks along with a sweet onion. Tip: To remove the skin more easily, place the squash in the microwave for a minute, then use a vegetable peeler to remove the skin.

Toss squash, carrots, onion, apples, and garlic in large bowl with olive oil and the dried herbs. Spread them on a baking sheet lined with parchment paper or tin foil. Roast veggies and fruit in oven for about 40 minutes, or until squash is tender and lightly browned.

Remove from oven and place the vegetable mixture into a large soup pot over medium heat.

Add your vegetable stock. Simmer for 15 minutes, and then remove the pot from the heat. Working in 2-3 batches, puree the soup in a blender until smooth. You can add more vegetable stock if the soup is too thick. Stir in cream until thoroughly mixed and serve!

I would also consider adding a dollop of crème fraiche and perhaps some savory nuts or roasted pumpkin seeds. Don’t forget a hunk of fresh bread to enjoy with your soup!! Enjoy!!!

I tripled the batch since I had three squashes, then I let the soup cool and froze it for some hot soup in the fall. I also gave some to Joyce and Bryan since they grew the squash just for me!!

Thanks Joyce and Bryan for the wonderful veggies and squash!!

With all of the harvesting going on, I decided I needed to wear my Quacker Factory 3/4 Sleeve Scoop Neck Harvest T-shirt (A217155) when I went to visit them!! I thought it was the perfect “fit.” 

Until next time—Quack, Quack!

Angel


To stay up to date at what’s Quackin’ at the Quacker Factory, join the email list! Click here to sign up to receive emails from www.QuackerFactory.com: http://bit.ly/Join_QF

To follow Angel on Facebook, click here:  http://bit.ly/A_Facebook

To follow Patrick on Facebook, click here:  http://bit.ly/P_Facebook

To follow Quacker Factory on Facebook, click here:  http://bit.ly/QF_Facebook


Check out more Quacker Factory harvest-inspired styles on QVC.com.


Where the Magic Happens - Susan Graver

$
0
0

A few weeks ago, Sandra Bennett and I took a trip to NYC to visit the Susan Graver offices to see where the Graver magic happens.. I am truly amazed each time I visit and wanted to share with you some of the fun facts and pics. Since the Susan Graver brand began on the Q, Susan has created over 100 TSV's over the years...


Here is a row of folders containing every detail from fabric, specs and details of each garment in the line.. Sort of organized like your doctor's office.. Lol …


The Graver team purchases 250 prints a year to design into the garments each year...


Here are the forms marked so that each garment matches the specs for all seven sizes...

Christina is showing us a light box..this is used to match color for all locations from the design studio to the factory to the Q...


There are at least 50 new designs created every month...


The Graver team in NYC has 85 people supporting the design and line plan through production in NYC... 


…Susan's designer attention to detail with buttons..


Gems and hardware used for designs..

The Graver team purchases 750 samples on their trips to Europe two times per year and 100's during the year in NYC for design inspiration.  


Susan looking at samples for inspiration... 


Production line not often found today in a NYC office.  

We had a wonderful day visiting NYC and working with Susan on her line...there is so much organization and attention to detail plus creativity that goes into her line! I love my Graver fashions even more! And guess who shares the same floor in NYC! Our friends from Tarte!

You can find me on Facebook at: www.facebook.com/PatJamesDeMentriQVC

Twitter: www.twitter.com/pdementri

Instagram: www.instagram.com/PatJamesDeMentriQVC

toGather: www.gather.qvc.com/member/PatJamesDementri

Pre-Planning your Holiday Lights & Decorations

$
0
0

That time of year is approaching fast and a little pre-planning on your part can really help to make your holiday lighting project a lot easier. Let me guide you through what I do each year and maybe one or two tips can help you.  Not only can a game plan reduce some of the usual frustration, but also could mean less time up on a ladder later. 

(Stringing the lights on the QVC outside set) on yes one of our Little Giant Ladders..)

Now before I begin let me say I don't expect you to go to the extremes, I do.  First, because you are probably sane, and for me, that train left the station in regards to Christmas lighting several years ago.

Start with a simple outline sketch of your home or the building/buildings you wish to light. You don't have to do what I do and that is start from detailed scale architectural drawings that I sat at my drafting board for days to create.  (what can I say, I wanted to be an architect when I was younger and who knew this televised shopping things would actually catch on).

On your drawing mark were each one of your outdoor electrical outlets are located.  This will help later when deciding where to start your light strings without excessive need for extra extension cords later.  Nothing is more frustrating than stringing a lot of lights only to find you put them up backwards with the wrong end of the cord at the far end of the gutter instead of closest to the wall outlet.  I have done it...more than once.


Measure estimated lengths of your gutters from on the ground, This doesn't have to be exact at this point.  If you’re going to be purchasing new light strands this year you have some numbers to work with when you do your shopping instead of just guessing. 

I am a man; therefore if relying on a well educated guess is my only alternative I will most always screw it up and buy three times more lights than I really needed.  When measuring a roof line from the ground that includes the peak of two roof lines coming together, don't just measure from corner to corner or you will come up short on your lights.  The peak of the roof has to be added into that measurement as well. 

The picture of one of my roof lines helps explain this.  If you draw an imaginary line from the lowest point of each side of the roof to the other...imagine in this case it would cut right through the chimney and would be right above our sliding glass doors.   Estimate the difference from that imaginary line and the top peak of the roof.   Double that distance and add it to the original measurement for the length of that wall.  I have found this works very well.

(Here i am on helping light the QVC outside set.. see the roof lines..)


Always be realistic in what you can accomplish. Read the boxes that lights come in and make sure you don't have more strands hooked end to end than the manufacturer recommends. Over loading a circuit is a recipe for bad things to happen.  Remember LED lights draw less energy than "light bulbs" with a filament and the run length can be much longer.  I made the decision to go strictly to LED a few years ago and happy I did so. Plus this way my wife can plug in a hair dryer after dark between Thanksgiving and New Years, without blowing fuses and unexpected visits from our local fire department.

I do a simple sketch early this time of year of exactly where I want to run lights and the directions (with arrows) that I intend to use them.  You can purchase at any hardware store what is a called a "three way splitter" that will allow you to continue a length of lights but head in another direction as well.  Again don't over load your circuits with the total number of lights on one outlet.  But if you are within the manufactures limitations than this is fine and will help you to get lights to an area that is not just in a straight line.


Ok one last thing, bushes and shrubs are tough to estimate in terms of how many lights it takes to make them look festive.  It takes more than you might think because you will be wrapping them around the circumference of that bush.   A good way to estimate the length of light stand or strands you will need is measure the height of the bush or shrub, then multiply that number by it's width.  Than take that measurement and multiply it by three.  An example, the two vertical acacia bushes that line my front entry way are roughly 6 feet tall, and 3 feet wide. 3 X 6 = 18...times 3 = 54 feet of lights..  for each bush. That was a lot more than I would have expected when I started this adventure but I have learned these things the hard way.


Bushes, trees and shrubs are the toughest things to light and we will tackle that together in my next blog. Enjoy the path way as much as the destiny.  Enjoy the planning as much as the end results.  Start now before it gets cold and allow yourself to get excited about it. 


The holidays come so quickly that is it so easy to get swept up and feel like they pass us by before we are even prepared. I know it is only October.  But starting now extends the holidays and keeps me in the spirit longer. To be honest, it's not about the lights at all, it's all about the feeling that I am actively in the moment and remembering the important things in life while doing so. 

Christmas lights are kind of my "electrical metaphor" for my private time with our creator.  And I don't just means the times when I say out loud, “OH please God don't let me fall off this ladder, or please don't let me get electrocuted".  I truly mean this when I say this.  

On a quiet night when the air is cool here in Pennsylvania, and I am able to get outside and see all the things I started planning weeks ago come to fruition, makes me smile.  And hopefully it makes make him smile as much, if not more so, than the neighbors who will drive by and see the lights for themselves. It reminds me be thankful, and for me that is the purest essence of what the holiday's mean. 

Enjoy.

You can find me on Facebook at: www.facebook.com/DanHughesQVC

Twitter: www.twitter.com/danhughesqvc

toGather: www.gather.qvc.com/member/DanHughes

The Final CP Show of the Year!

$
0
0

It’s my favorite time of year, so Bill and I jam packed our weekend before I head off to QVC! The Albuquerque International Balloon Fiesta kicked off on Saturday, and the morning mass ascension was spectacular! We couldn’t have asked for better weather.  I just love seeing 100,000+ smiles! 

Next, we headed to the Grecian Festival for some food, music and dance.  It makes me happy to see teenage boys and girls dressed in traditional clothing proudly and joyfully performing their Greek dances.  From there, we headed to Wagner Farms in the Village of Corrales for our annual bushel of green chile, smelling them fire roasting while we picked out a pumpkin.  With a trunk load of chile, it was time to head home to pack them up for freezing.  We pull out the larger ones, what we call “rellenos worthy”, and label those bags with an “R”.  All this chile inspired me to cook up some of my favorite recipes on Sunday, and I was excited to open up my new set of Temp-tations cookware. My Chicken Mezra with Red Chile Glaze and Calabacitas looked great in the baking dishes!  And I love how the harvest motif on this set looks next to my big pot of Green Chile Stew!   If you’d like to bring the taste of New Mexico into your kitchen, you can find the recipes on my Facebook page

I have an idea….since this is my last Carolyn Pollack Jewelry event of the year, why don’t we all gather around the TV with a pot of Green Chile stew for a virtual harvest party on October 9th?  I’ll be with two of my very dear friends; Nancy for an hour at 4pm ET, and Jane for two hours at 7pm ET!  There will be lots of new, many favorites, and some amazing clearance prices on retiring styles.  I hope you will join us for some fun girl time.  And thank you from all of us at Relios for a wonderful year! Have a beautiful autumn.

Love,

Carolyn


Customer Choice Beauty Awards

National Gumbo Day!

$
0
0

It’s that time of year! In celebration of National Gumbo Day this Sunday, the 12th, I’ve included three of my all-time favorite Gumbo recipes below. Not only is Gumbo the official cuisine for the state of Louisiana, it is the perfect dish for the crisp Fall weather. Enjoy these recipes and don’t forget to tune-in to QVC today at 11 a.m., 3 p.m., 4 p.m. & 8 p.m. And check out everything ‘Emeril’ on QVC.com, including items that are featured on my new cooking competition show on TNT called “On the Menu”! 

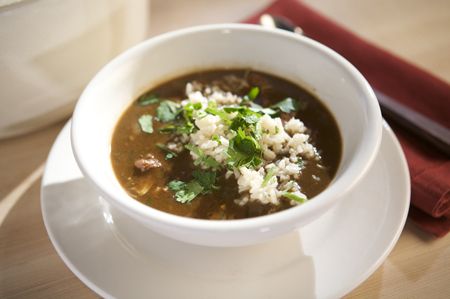
Duck & Wild Mushroom Gumbo

Duck and wild mushrooms are the perfect partners in this rich, earthy gumbo. Should you happen to have a duck hunter in your family, feel free to substitute an equal weight of wild ducks for truly deep duck flavor.

  • Prep Time: 30 minutes
  • Total Time: 6 hours
  • Yield: 4 quarts, 8 servings

Ingredients

  • 1 large duck (5 to 6 pounds)
  • 2 teaspoons Rustic Rub
  • 2 teaspoons plus 1 cup vegetable oil
  • 6 quarts water
  • 2 onions, quartered
  • 2 ribs of celery, coarsely chopped
  • 4 cloves garlic, smashed
  • 4 bay leaves
  • 3 sprigs of fresh thyme
  • 1 teaspoon black peppercorns
  • 1 1/4 cups flour
  • 2 cups chopped onions
  • 1 cup chopped bell peppers
  • 1 cup chopped celery
  • 2 tablespoons minced garlic
  • 1/2 teaspoon dried thyme
  • Salt and cayenne pepper
  • 6 cups sliced assorted wild mushrooms, such as shiitakes, oysters, or chanterelles
  • 8 cups cooked white rice
  • 1/2 cup chopped green onions

Directions

Preheat the oven to 450°F.

Remove the neck and any innards from the cavity of the duck and rinse innards and duck well under cool running water. Pat dry.

Using a sharp boning knife, cut the legs away from the duck and then cut each leg quarter in half at the joint. Cut the wings off of the duck, then carefully cut the breast meat away from the bones. Cut each breast half into two pieces. Place the 2 legs, 2 thighs and 4 portions of breast meat onto a platter and season with the Rustic Rub. Cover with plastic wrap and refrigerate while you make the duck stock.

Cover a large baking sheet with aluminum foil and drizzle the 2 teaspoons of vegetable oil over the foil. Cut the duck wings apart at the joints and place them on the baking sheet. Cut the duck carcass into several pieces using poultry scissors and place on the baking sheet. Add the reserved neck, gizzards, and heart to the baking sheet and season everything lightly with salt and pepper. Transfer to the oven and roast until everything is golden brown, 40 minutes to an hour, turning as necessary to promote even browning.

Place the roasted duck pieces into a large stockpot and add the water, quartered onions, celery ribs, smashed garlic, 2 of the bay leaves, thyme sprigs and peppercorns. Bring to a boil over high heat, reduce the heat to a simmer, and cook, skimming any scum from the surface, until you have a rich stock, 2 to 3 hours.

Remove from the heat and strain the stock through a fine-mesh sieve. Discard all solids. Set stock aside while you make the roux.

Heat the remaining cup of oil over medium high heat in a large, heavy Dutch oven until hot. Whisk in the flour and cook, stirring constantly, until the roux turns the color of a dark copper penny. Should the roux begin browning too quickly, reduce the heat so that it doesn't burn. As soon as the roux is the correct color, immediately add the chopped onions, bell peppers, celery, and garlic and cook, stirring, until the vegetables are tender, about 6 minutes. Slowly whisk in the stock and add the remaining 2 bay leaves, the dried thyme, and season lightly with salt and cayenne. Bring the liquid to a boil and then reduce the heat to a simmer.

While the liquid is coming to a simmer, heat a large nonstick skillet over high heat. When hot, add the seasoned duck pieces, skin-side down, and cook until golden brown and crispy. Brown on the second side and then add the duck pieces to the gumbo.

To the drippings remaining in the skillet, add the mushrooms, in batches if necessary, and season lightly with salt and pepper. Saute until the mushrooms are golden brown and fragrant. Add the mushrooms to the gumbo and cook the gumbo until any floury taste is gone and the duck is tender and falling from the bone. Serve the gumbo with each guest getting a piece of duck or, if preferred, remove the pieces of duck from the gumbo and take the meat from the bones. Stir the duck back into the gumbo and serve over hot white rice, garnished with green onions.


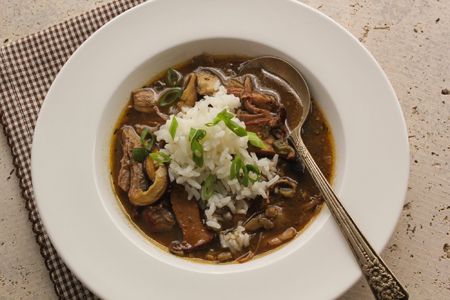
Chicken And Smoked Sausage Gumbo

This classic gumbo is always a favorite at Emeril's Restaurants. It's packed with flavor and great for parties or tailgating. Make this gumbo the night before for even more flavor. Just warm it up, whip up some rice and put out the hot sauce when you're ready to serve.

  • Prep Time: 30 minutes
  • Total Time: 2 1/2 to 3 hours
  • Yield: 6


Ingredients


For the stock


  • One 4-pound chicken, rinsed and dried, cut into pieces
  • 1 onion, unpeeled, quartered
  • 1 rib celery, cut into 2-inch lengths
  • 2 cloves garlic, smashed
  • 2 bay leaves
  • 2 quarts water, chicken stock, or canned low-sodium chicken broth
  • 1 teaspoon salt
  • 1 teaspoon freshly ground pepper

For the roux and gumbo

  • 1 cup vegetable oil
  • 1 cup flour
  • 3 onions, chopped
  • 2 ribs celery, finely chopped
  • 1/2 green bell pepper, finely chopped
  • 2 tablespoons minced garlic
  • 1/2 teaspoon cayenne, plus more to taste
  • 2 bay leaves
  • 1 1/2 pounds smoked sausage, halved lengthwise, then cut crosswise into half moons
  • 1 bunch scallions, thinly sliced
  • 1/3 cup chopped fresh parsley leaves
  • Salt to taste
  • Cooked white rice, for serving
  • Louisiana hot sauce, for serving
  • File, for serving

Directions

Place chicken, onion, celery, garlic, bay leaves, and liquid to cover the chicken by 1 inch in a large soup pot or small stockpot. Add salt and pepper and bring to a gentle simmer. Cook, skimming any foam that rises to the surface, until chicken is fall-from-the-bone tender, 45 minutes to 1 hour. (Add water if necessary to keep chicken submerged in liquid.)

Remove chicken to a heatproof bowl and set aside to cool. Strain broth through a fine-mesh sieve and set aside. When chicken is cool enough to handle, remove skin and bones; discard. Pull meat into bite-size pieces and place in a bowl; refrigerate until needed.

While stock is simmering, make roux: In a large, heavy-bottomed Dutch oven, heat oil over medium-high heat; whisk in flour. Cook, stirring constantly, reaching every portion of the bottom of the pot, until roux begins to take on some color. Reduce heat to medium or medium-low and continue cooking and stirring constantly until roux reaches the color of milk chocolate. (The timing here will vary depending on your cooktop as well as the pan you are using; the most important thing is to not let any portion of the roux scorch, and to stir constantly until you've reached the desired color.)

Add the chopped onions, celery, and bell pepper and cook, stirring frequently, until vegetables have softened, 5 to 7 minutes. If stock has cooled by this time, add it to roux-vegetable mixture along with cayenne and bay leaves, and stir to combine. (If stock has not cooled by the time vegetables have softened, set aside to cool; you should always add a hot stock to a cool roux or vice versa.)

Once roux and stock are combined, bring to a gentle simmer. Continue to simmer until sauce is thickened and flavorful, about 2 hours, skimming any foam or excess oil that comes to the surface.

While simmering, saute sausage in a large skillet over medium-high heat until browned on all sides. Add sausage to gumbo. Taste gumbo and season lightly with salt. Simmer for 2 hours.

After simmering, add chicken, chopped scallions, and parsley to gumbo. Stir well and continue to simmer for 30 minutes longer. Adjust thickness if necessary, then season with salt and cayenne to taste.

Serve gumbo ladled over hot white rice in large shallow bowls, with hot sauce and file at the table for guests to use to their liking.

Cook's Note: Gumbo thickness is a matter of personal preference. Some folks enjoy a very thick gravylike sauce, and others prefer their's to be more on the brothy side. Either is correct; make it how you like it!


Emeril's Classic Seafood Gumbo

You can't go wrong with this classic seafood gumbo, which is chock-full of shrimp, fish, and oysters swimming in a broth richly flavored with gumbo crabs.

  • Prep Time: 30 minutes
  • Total Time: 2 to 2 1/2 hours
  • Yield: 3 quarts, 8 to 10 servings

Ingredients

  • 3/4 cup vegetable oil
  • 1 cup all-purpose flour
  • 1 1/2 cups finely chopped onions
  • 3/4 cup finely chopped green bell peppers
  • 3/4 cup finely chopped celery
  • 2 tablespoons minced garlic
  • One 12-ounce bottle amber beer
  • 6 cups Shrimp Stock
  • 1/4 teaspoon dried thyme
  • 2 bay leaves
  • 1/2 pound gumbo crabs (about 2)
  • 2 teaspoons Worcestershire sauce
  • 1 1/2 teaspoons salt
  • 1/2 teaspoon cayenne pepper
  • 1 pound medium shrimp, peeled and deveined
  • 1 pound white fish fillets, such as catfish, grouper, snapper, or sole
  • 1 tablespoon Emeril's Original Essence
  • 2 cups shucked oysters with their liquor
  • 1/4 cup chopped fresh parsley
  • 1/2 cup chopped tender green onion tops
  • White Rice, for serving

Directions

Place an 8-quart stockpot over medium heat, and add the oil. Allow the oil to heat for about 5 minutes, then add the flour to the pot. Stir the oil and flour together with a wooden spoon to form a roux. Lower the heat to medium low and continue to stir the roux for 15 to 20 minutes, or until the color of milk chocolate. Add the onions, bell peppers, and celery to the roux and stir to blend. Stir the vegetables for 5 minutes, then add the garlic. Cook the garlic for 30 seconds before adding the beer and Shrimp Stock to the pot. Season the gumbo with the thyme, bay leaves, gumbo crabs, Worcestershire, salt, and cayenne. Bring the gumbo to a boil and lower the heat to a simmer. Continue to simmer the gumbo for 1 hour, skimming the foam and any oil that rises to the surface.

Season both the shrimp and the catfish with 1 1/2 teaspoons Essence. Stir the shrimp and fish into the gumbo and cook for 2 minutes. Add the oysters to the pot and cook, stirring often, for an additional 5 minutes. Taste the gumbo and season if necessary.

Garnish with the parsley and green onions and serve in shallow bowls over white rice.


Recipes Courtesy Emeril Lagasse


Clam Dip in a Bread Bowl -- Try Something New at Your Next Party

$
0
0

Hi, everyone!

My dearest friend David Venable’s cookbook shipped from QVC’s doors today to those of you who already picked up his second comfort food cookbook, Back Around the Table! If you haven’t gotten your copy yet, I HIGHLY recommend it. I’ve had the pleasure of trying quite a few of the recipes when I presented it with him on air, and I wanted to Happy Dance my way across the room.

This Wednesday on You’re Home with Jill we’re talking about grown-up entertaining. On Friday, I showed you how to make personalized wine-glass charms from old games. And today, I’d like to introduce you to a yummy appetizer that’s sure to surprise and delight. Everyone makes spinach-artichoke dip. Everyone makes crab dip. I like to make Clam Dip. And, I love serving it in a crusty, hearty bread bowl…you get the vessel and the dippers all in one.

Clam Dip in a Bread Bowl

Clam Dip in a Bread Bowl

Ingredients:

  • 2 large, round sourdough bread loaves (1 for baking, 1 for dipping)
  • 2 (8-oz) packages cream cheese, softened
  • 2 (6-oz) cans minced clams, drained but liquid reserved
  • 1/2 cup clam juice
  • 2 Tbsp lemon juice
  • 1 tsp salt
  • 3 green onions, chopped

Preparation:

  1. Preheat oven to 350°F.
  2. Cut the top off of one loaf of bread. Hollow out the inside and break (or cube) the pieces into bite-size portions.
  3. In an electric mixer, combine the softened cream cheese, clam liquid, clam juice, lemon juice, and salt. Mix well until combined. Fold in the drained clams and green onion.
  4. Spoon dip mixture into hollowed out bread bowl. Bake for 30 minutes.
  5. While the dip is baking, cut the second loaf of bread into bite-size pieces for dipping.

This recipe is prepared with the KitchenAid 721 Series 7-Speed Digital Hand Mixer (K39602).

Enjoy! I’ll see you tomorrow night on You’re Home with Jillat 7pm ET. For more great dip ideas check out my recipe page on QVC.com.

From my home to yours,
—Jill

Celebrating the Fall Harvest

$
0
0

Fall harvest is the time to celebrate the bounty of the growing season.  Pat, Wendy & I spent a day at Linvilla Orchards in Media, Pa.  We took on the challenge of the corn maze and with a little help from a friend made it to the end.  

We made a few friends at the petting zoo..

Walk this way…

Apple slinging was a blast, literally!

Field of Dreams…

Shopping was a Hoot!!

The Great Pumpkin’s...

Gourd-eous...

Hello my pretty…

Stay tuned for the Fashionably Early pumpkin decorating contest.

Caramel or Candy apple?

Love this look!

I scream, you scream, we all scream for ice cream!!

YUM!

Stalkers…LOL

Thanks for joining us.  Have a wonder-fall day!!!


Lisa and Leslie - Friendship Blog

$
0
0

I have known Lisa Robertson for 17 years, 1 month and 6 days.  We met at Bare Escentuals King of Prussia boutique where I was introducing her to my pure and healthy bareMinerals foundation and warmth.   She was definitely skeptical, but hey, everyone was back then. 

On-Air

Lisa and Leslie

We have “grown-up” together in many ways on TV and off.   I would come into town and stay at her house when I had Bare Escentuals shows.  We had a routine, when I would arrive off the plane from San Francisco we would spend the first night talking til the wee hours.  I’m telling you, I’m normally in bed by 10:30pm at home but when we are together 3am crops up pretty quickly!  Staying in and watching movies, Murder she Wrote or Babylon 5 and she would always make her signature popcorn.  We of course spent plenty of time around food but it is hilarious when I think of how our eating habits have evolved over time– she has gotten SO healthy these last few years.  Wow, can’t a girl get a burger and fries? Ha!  Actually I appreciate her discipline (my willpower stinks).

Backstage

Beauty Set

My favorite time to visit is the Holiday season.  Lisa celebrates in style and I always feel like I’m in the movie White Christmas when I’m in her house and that Danny Kaye and Bing Crosby are going to be sitting on the couch enjoying hot chocolate with us.  Her house is a winter wonderland.  Trees with magnificent ornaments, garland and those elegant poinsettias lining the staircase.  She would take me on a tour of the neighborhood too.  I LOVED our car drives together.  In the summer we would watch the fireflies and in December the gorgeous Christmas lights. 

Christmas Beauty Set

Backstage Hugs

You know this already but I will tell you anyway.  Lisa is the real deal.  We are all so fortunate to have her in our lives everyday, aren’t we?  All I have to do is tune in whenever I want to see her.  She is just the same in person, funny, super smart and uber stylish!  Imagine the two of us in her bedroom closet trying on clothes together and posing in the mirror (Lisa has a lot of gowns and I like to play dress up).

Behind the Scenes

A True Friend

She is a crack up and the most beautiful woman on the planet not just in physical beauty but she is also a giver…always thinks about her friends first.  I’ve been one lucky girl to have her in my life since 1997.   I think we have gotten even better with age -- and you know?  All of you are part of the reason.  You guys have shown us your love and it means the WORLD to us.  So thanks to you, my friends and I will be sure we toast to you when I’m at her house this week. (So excited!!!)

Revealing the painting On-Air

A Painting of Us

Lisa, you are beyond special – a gift!  And I’m honored to be your friend.

Love you forever,

Leslie 

Some of My Favorite Holiday Decor - A Lisa Robertson Christmas Starts Friday!!

$
0
0

This week we are starting A Lisa Robertson Christmas! Each Friday night between now and December 12 with Posh Presents, we'll have a show full of great Christmas gifts or beautiful Christmas decor. I am amazed at how beautiful the decor turned out this year. It is really stunning and easy-to-use and I can't wait for you to see it! I was going to tell you about some of my favorite pieces but there are so many I don't know where to start!

Sparkly White Trees

Sparkly White Trees & Decorations

Fruit Christmas Tree

Santa's Sleigh

Coffee Table Display

Festive Fireplace

Happy Snowman
Nutcrackers

Christmas Owl

Silvery Trees

Mantle Close-up

Sparkly White Tree

The gift shows are going to be shows where we choose everything especially for you. If you have a hard-to-shop-for person on your list, I think you'll find some great ideas. So join us every Friday night between now and December 12 to get first look at some of the newest ideas for holiday. And don't forget the sneak peeks on Facebook!

See you Friday night at 10pm ET! :-)
--Lisa

Bree Takes Florida!

$
0
0

Bree’s beach bum status was confirmed back in June when we hit the Jersey Shore for a family vacation. It was a relief knowing that not only could she handle a day spent wearing a bathing suit at the beach covered in sunscreen, but she actually LOVED IT. I say it was a relief because me and Steve love the beach, especially Stone Harbor. It’s our happy place!

Since, we got the okay from our successful shore trip, we decided to plan our first big family vacation for the three of us in Florida. The trip brought a lot of firsts…

Bree’s first airplane ride:

Her first time sitting in a high chair:

Her first ride in the stroller diaper free:

Her first time behind the wheel LOL! Check out our little golf cart driver!

Her first playroom that didn’t consist of her mat and jumper in our family room:

Well not her first snooze on the beach on in Daddy’s arms but still this was really cute...


Her first time getting caught in the rain with Mommy and Daddy (more so Mommy and Daddy getting caught in the rain… we came prepared for her!)

Her first morning stroll in a place that she didn't really recognize lol!

Bree's first time with her toes in the water! 

Oh and not to mention the first time in a long time Mommy and Daddy had alone time!! I use the word "alone time" sparingly considering we were actually watching her sleep right in front of us in her stroller, but we were very thankful for the long nap!

All in all it was such a great trip!! We were sad to leave the sunshine, but it was the perfect break for the three of us.


Until next time Florida!! For now we are going to enjoy every bit of fall and pumpkin spice everything! 


The Formal, The Casual and Everything in Between

$
0
0

Hi everyone. I am really happy to be back with you for October’s shows and to introduce you to a lovely new item. As you know, I design jewelry that should be worn all the time. As I always say, my pieces can go from blue jeans to black tie! Versatility is so important and I believe that my designs are for everything from the soccer game to the gala.

My calendar is filled with special events that mean so much to me. October is National Breast Cancer Awareness Month and every year, I attend the Breast Cancer Research Fund luncheon. My dear friend, the late Evelyn Lauder, founded the BCRF and the luncheon is held every year.  

This month is also full of events and outings that are less formal but still equally important. Last week, Ron and I had the chance to go to dinner with some of our good friends. My schedule is very busy with travel and work, so dinner is a great opportunity to catch up with the people that are close to me.

Whether you are attending a formal luncheon or just getting dinner with friends, I have a new piece that is perfect for you – my sterling silver interchangeable earring set. I think that stud sets are one of the easiest types of jewelry for transitioning from formal to casual and there’s something so elegant about a clean, simple pair of studs.

Each set comes with a fabulous earring jacket, so you can dress up or dress down the piece. Style the look even more by choosing your favorite gemstones or wearing the studs with Diamonique simulated diamond.

Your choice of semiprecious gemstones is fantastic. This set comes in warm honey Citrine, a romantic Amethyst or a bold Blue Citrine.

When I created this pair, I was inspired by the women with packed social calendars. I remember when I was raising my children, any particular day could include a big board presentation, a PTA meeting and a formal dinner. I envisioned a stud set that works with this type of schedule and that helps you to feel beautiful as you go about all of your obligations.

I always say never underestimate a good classic and this month’s TSV really is the epitome of classic.

Beautiful jewelry isn’t just for special occasions it’s for every single day of the week. Each set of these dazzling studs comes with one colorful gemstone, one Diamonique simulated diamond and a textured earring jacket. So, instead of getting one sparkling pair, you’re actually getting four unique looks that you can customize and dress up or dress down depending on the occasion. 

The chic simplicity of this pair adds a sparkle to your casual everyday look but can also elevate your style for more formal occasions. 

I am also ready to introduce another staple – my new, quilted watch. With a classic tank design and a soft, quilted leather strap, this piece is the perfect item to polish your fall look. A watch is a nice way to add a pop of color to your outfit, so I designed this piece in purple, black, green, beige and red.

Mark your planner and meet me on QVC this Friday. You can watch my shows from 12-1am, 1-2am, 3-5am, 10am-12pm, 2-5pm and 7-9pm. I’ll be back on Saturday from 3-5pm, 7-9pm and at 9:30pm.

With love,

Judith


Discover Why Shoes on Sale is Personal to Marc Fisher and his Family..........

$
0
0

Marc Fisher Profile PicShoes On Sale is a personal and emotional journey for the entire Fisher Family.  Created by my sister Jodi who lost her battle to cancer 5 years ago and my dad Jerome Fisher as co-founder to rally the footwear industry in support awareness and funding for a cure . Since then we have raised millions which is encouraging as we need to continue supporting Jodi's vision and to finish what she so passionately and selflessly started.

We’ve also created The Jodi in memory of my sister and her work for breast cancer research and awareness, exclusively for QVC.

Please join me on October 16th for Shoes on Sale! See you on air!

Marc Fisher

Marc Fisher Shoe on Sale Shoe Image

Viewing all 3342 articles
Browse latest View live


Latest Images